8606 Mississippi Street , Merrillville IN 46410 (219) 769-1905 Monday - Thursday 9:00AM -5:00 PM Friday 9:00am-4:00pm / Closed Saturday -Sunday

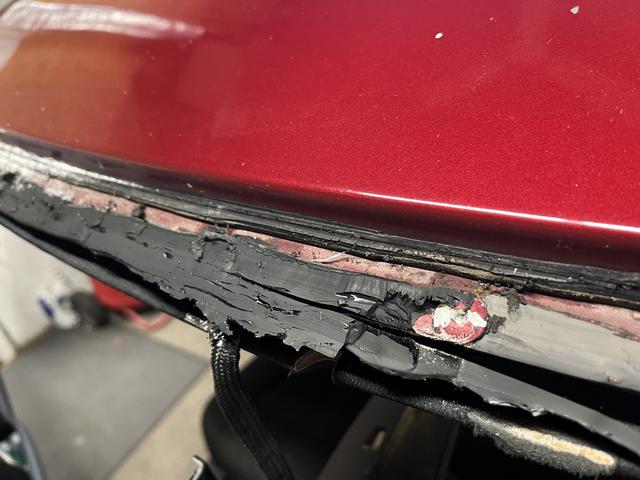

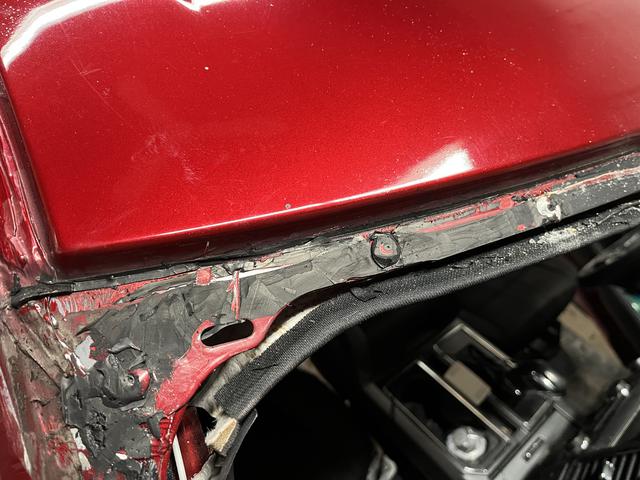

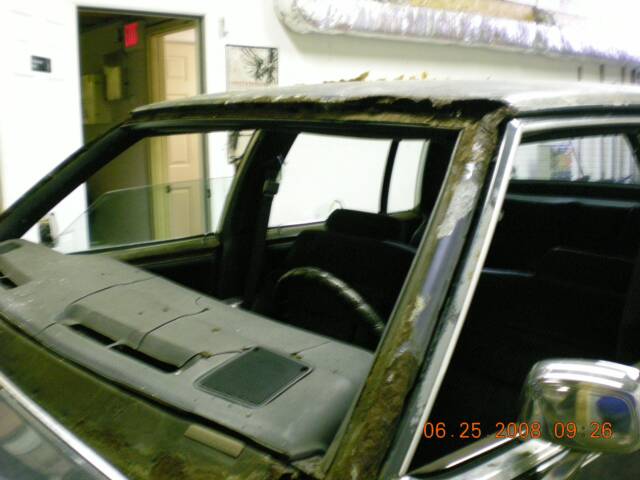
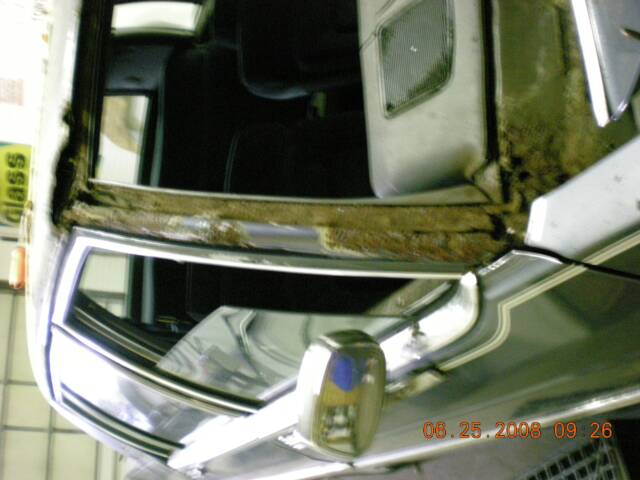
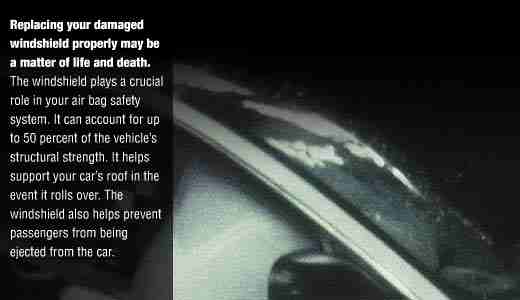
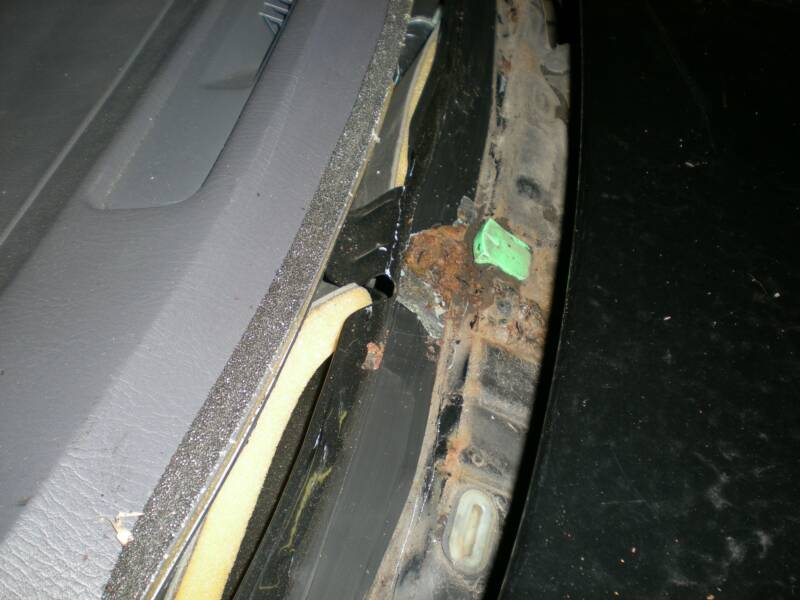
And sometimes there is not visible rust till we remove the windshield - in this case we have to brush sand the rust off - and apply a rust imhibitor and the prime the windshield lip -- also notice the lip this is were your windshield is attached to your vehicle--- and the urethane is the only thing holding your glass in ----------- this is the reason we keep your car for two or more hours after install to have the urethane time to set up before you drive away.
the process of a windshield install - its is not a slap in job----- this is the lip your glass get installed on and is what keeps your vehicles stability--- moldings if you have them are just decorative to cover the A Pillar gap if needed.
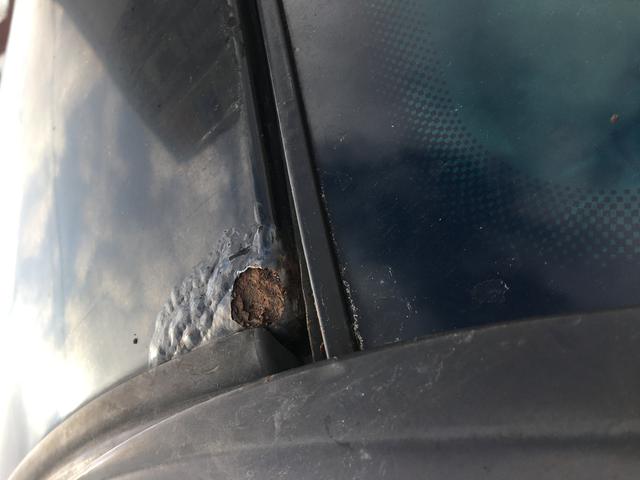
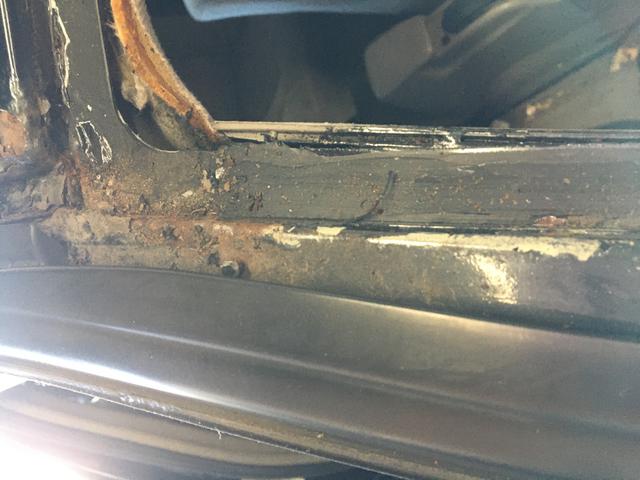
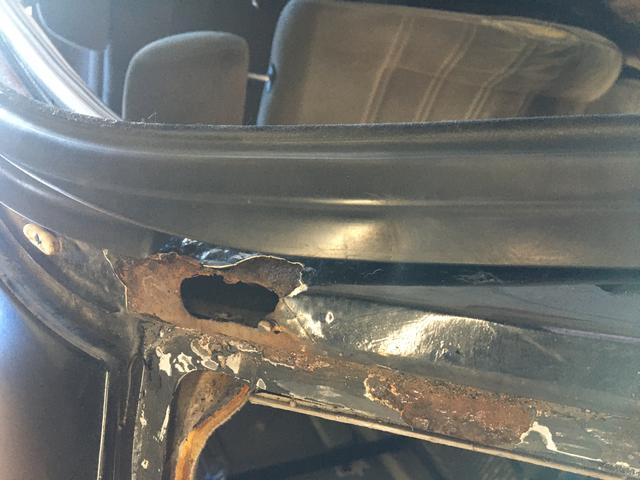
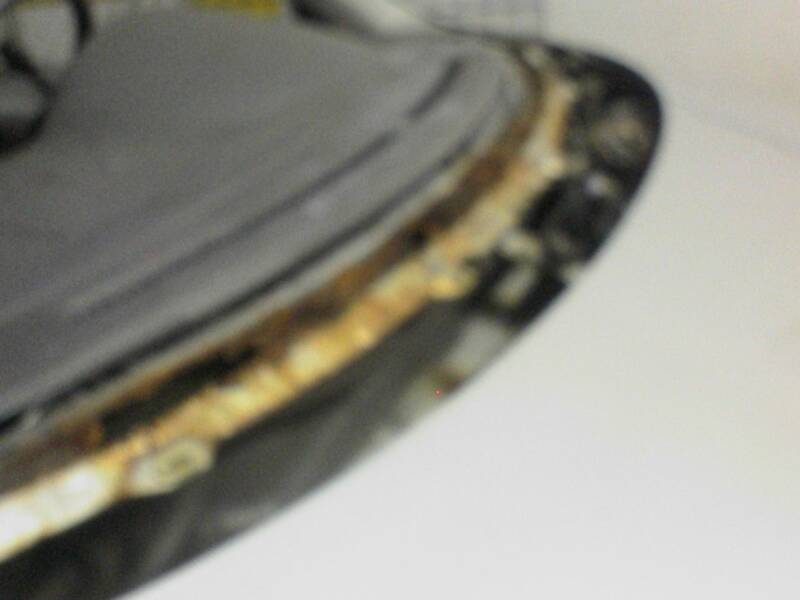
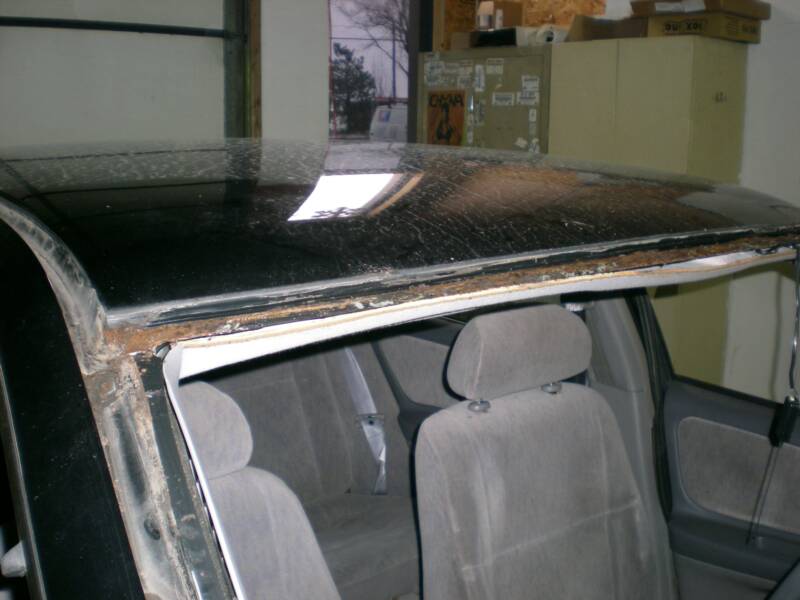
As you can see from the first photo we could tell there was rust issue we just do not know who bad till the windshield is removed. and there was a large hole on the drivers side- With this install we send the customer pictures of the damage and body work will have to be done to the windshield lip so we can then install the windshield.. So this added time to the install about three days. for body work , dry time , then install of the windsheld


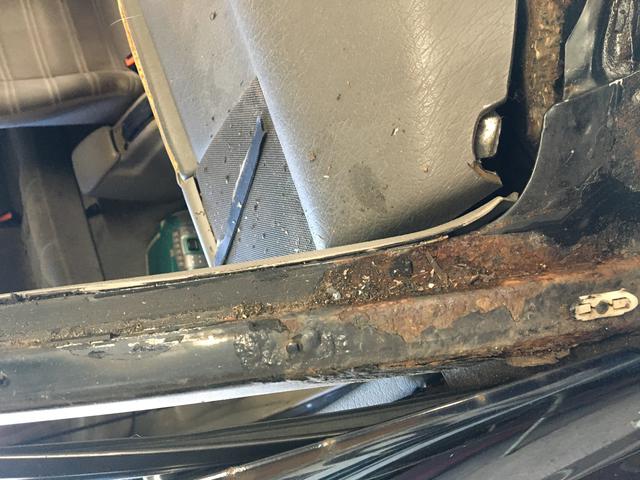
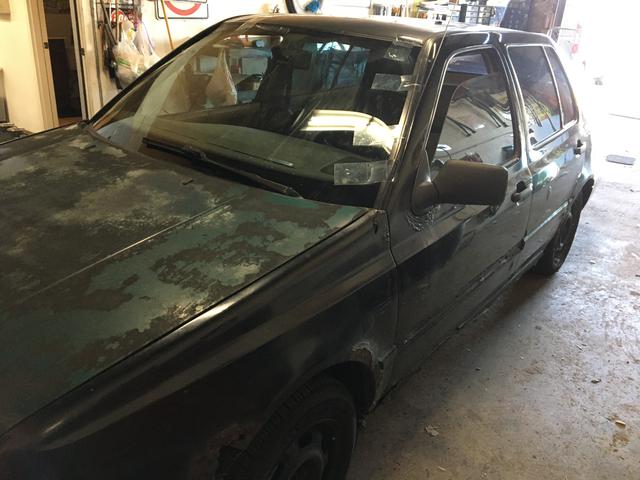
Bad installs
that we have had to repair
this was a customer who brought their car in because the glass was loose- example of a bad install and body work that needed to be done before a new glass could be installed.
How we Replace a Windshield in 15 Steps
(sometimes more) layman terms
Use hand tools to remove the rear view mirror and any hardware attached to the old windshield.
Remove the wiper blades, windshield gasket and plastic molding around the windshield perimeter and cowl. . (may differ on each vehicle - see moldings)
Separate the windshield from the pinch weld with a cold knife and or extractor knife on some vehicle
Use a cold knife to cut the urethane seal around the perimeter of the windshield.
Remove the old windshield. Be careful not to damage the paint or bonding surface. (remove any stickers that the customer may want or need to be replaced. )
Now you should have an empty windshield frame. Use a razor blade scraper to remove as much of the old urethane as possible. Be careful not to scratch the paint or the bonding surface. Don’t worry if you can’t remove all the old urethane, a thin layer helps the new urethane form a stronger bond. Remove any rust spots with sandpaper or a wire brush to prevent it from spreading.
Clean up the bonding surface with a stiff nylon brush to remove any loose particles. Vacuum any debris around the area and clean up your work area before continuing.
Use pure alcohol 99% to clean the new windshield perimeter where the urethane will contact it.to remove any silicone ect for a clean install.
Body primmer is now installed and let to dry per manufactures directions.
Lay a continuous and even bead of urethane around the perimeter of the windshield frame.
An electric or air powered caulk gun makes this job a lot easier.
Fill any gaps in the urethane bead before you continue.
Install the windshield as soon as possible to prevent the urethane from curing before installation.
Use suction cup window holders to lower the new windshield into place.
Position the windshield in the correct spot.
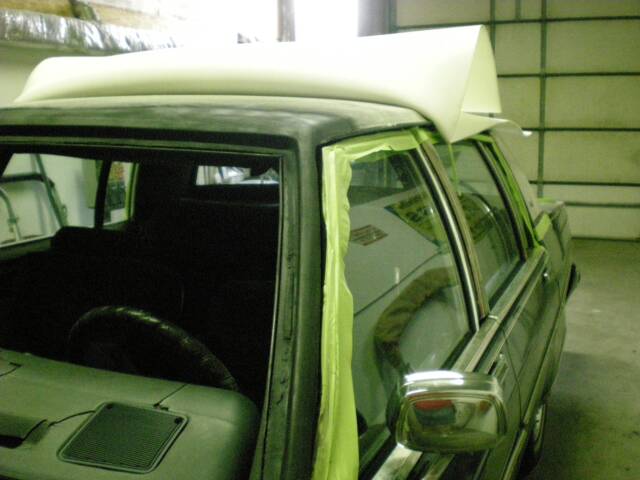
Use tape to hold the windshield in place and prevent it from sliding around while the urethane cures.
Allow the urethane to cure for the allotted time specified by the manufacturer.
Reinstall the windshield cowl. wipers and any body molding and/or plastic molding, rear view mirror and any hardware you removed.
If necessary, take the car to a dealer to have the ADAS calibrated.
Why do they put tape on a new windshield?
Why do you have to leave tape on new windshield? | NuVision ...
The tape helps to hold the windshield in place while the adhesive cures. The adhesive used to attach a windshield takes several hours to cure, and during this time, the windshield is still soft and can easily shift out of position.
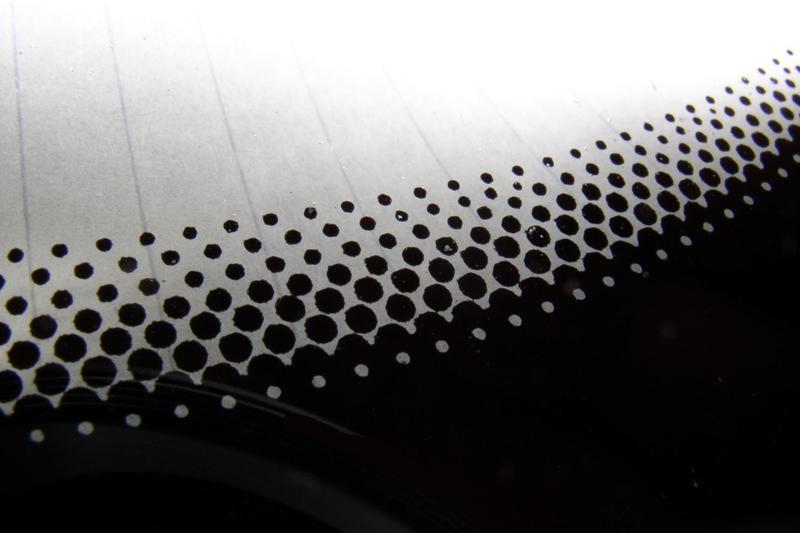
What is the purpose of the frit on a windshield?
The Purpose of the Frit (Black Band) and Spots on Windshield ...
There is a dual purpose here, though. While the inward facing side of the frit allows adhesive to bond to the glass, the outward facing side of the frit acts as a shield against UV radiation in order to protect the adhesive bond, which would otherwise be weakened by continual exposure to direct sunlight.